29.12.2023 | 15:05
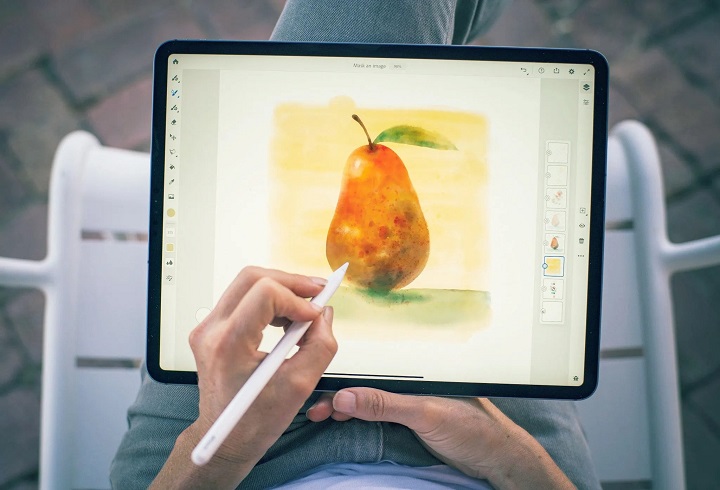
Whats the Best iPads for Digital Art?
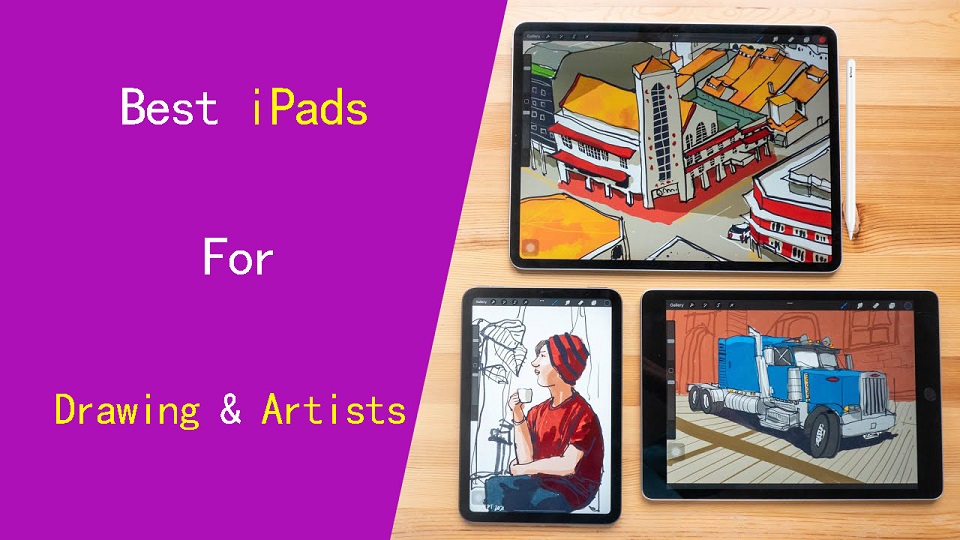
Since Apple launched the Apple Pencil in 2015, iPad has quickly become a favorite drawing tool for many digital artists.
You draw with Apple pencil directly on your screen, Much like you do with a pen and paper.
Unlike traditional drawing tablet, iPad doesn't need connection to a computer or any other device. It allows you to take it with you and draw wherever you feel like it.
They are powerful, portable, convenient, versatility, and even have some exclusive art apps like Procreate.
Whether you're a pro or a beginner, you can create stunning looking digital art with iPad.
There are more iPads than ever — especially when you look at how similar so many of the models are, and it can be tough to sort out which one is the best for you.
Fortunately, We compared the main characteristics of best iPads for drawing and artists. Just to guide you through your next iPad purchase.
How to Choose the Best iPad for Drawing?
As you can see, iPads vary greatly in terms of screen size, processor, capacity and of course price.
When picking the best iPad for drawing, there are a few important things you need to consider:
Display Quality
A high-quality display is crucial for drawing, as it affects color accuracy and detail.
Luckily, Apple has always been known for having some of the best quality displays in the market, so even the most basic iPad will have a better display quality than most devices.
Look for iPads with more screen technology (XDR, True Tone, and ProMotion), higher pixel density, wide color gamut for better visuals and drawing performance.
Liquid Retina XDR based on Mini-LED panel, has a superb level of 1,000,000:1 contrast, which is supposed to make it look close to an OLED display.
True Tone technology adjusts the color temperature of the display based on ambient lighting, providing a more accurate and consistent viewing experience.
ProMotion technology delivers a 120Hz refresh rate for ultra-smooth drawing and seamless navigation.
High-density screens have more pixels per inch than low-density ones.
Wider color gamut means richer, more vibrant colors, allowing artists to create and view their work with impressive color fidelity.
Screen Size
The size of the iPad depends on personal preference and intended use.
A larger screen provides more canvas space, but it also means a heavier and less portable device.
Consider your mobility needs and drawing preferences when choosing a size.
Laminated Screen vs non-laminated screen
The non-laminated displays have a tiny air gap between the layers, while laminated displays consist of a single, multitasking layer.
Laminated displays offer a superior visual display, anti-glare, thinner profile, and helps reduce the parallax to the lowest and gives you full control on the cursor to where you expect to be.
As for non-laminated screen, The air gap causes more parallax, some light refraction, and the image does not appear as clear and contrasty. It also produce some hollow sounds when tapping or drawing.
Processor
A powerful processor ensures smooth performance and responsiveness while using drawing apps.
CPU is the "brain" of the iPad, controls the overall operation of the device. Additionally, Apple's processor also feature GPU, which takes care of the visual side of the tasks.
Both the A-series and new M-series processors are Arm-based, But A-series processor are not as fast as the M-series chipset.
Look for iPads with the latest generation Chipset for optimal performance, especially if you plan to work with complex or resource-intensive projects.
Memory
Random Access Memory (RAM) allows your device work faster when multi-tasking, and in apps like Procreate and Adobe Fresco more memory means more layers to work with.
Memory requirements for picking the best ipad depends entirely on your needs, but we usually recommend at least 3GB for any machine and 4GB for a high-performance system.
Storage
Adequate storage is essential for storing your artwork, apps, and project files. Choose an iPad with sufficient storage capacity based on your needs.
Keep in mind that larger storage options tend to be more expensive, so consider cloud storage or external storage options if you require more space.
Battery Life
The iPad works as a mobile device, has a battery that limits the time you can spend on it.
Normally, if you care about mobility, you should choose an ipad with a larger battery capacity.
Price
The price range for iPads varies significantly, range in cost from $250 to more than $1000 . Determine your budget and balance it with your desired features.
Keep in mind that newer models with advanced features may come at a higher price point, while older models may offer a more affordable option.
6 Best ipads for Drawing and Artists in 2024
Several iPad models are excellent for drawing, catering to different needs and budgets. Here are a few noteworthy options:
1. ipad Pro 12.9
2. iPad Pro 11
3. iPad Air (5th generation)
4. iPad Mini (6th generation)
5. iPad (9th generation)
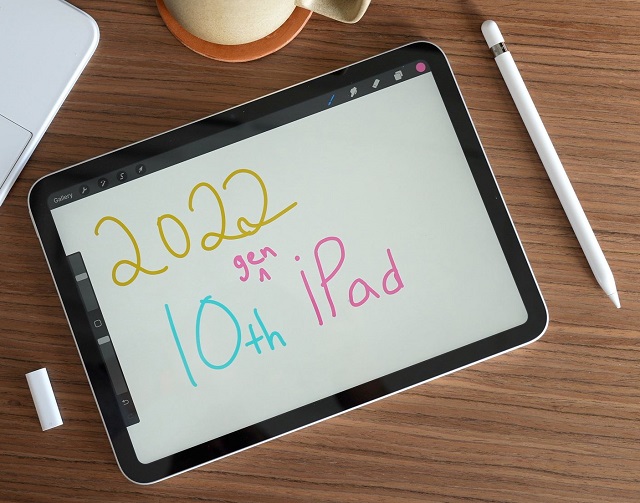
6. iPad (10th generation)
Conclusion
Having the right tools is very important for every artist!
Even though ipads are pricey, these devices fulfill the task that laptop and a pen display can do for the same amount of money, adding the bonus of portability.
From standard budget ipad to iPad Pro M2 12.9-inch, Choosing the best iPad for drawing often depends on your specific needs, preferences, and budget.
Factors like screen size and quality, processing power, Apple Pencil compatibility, and additional features can influence your decision.
We hope you've found this article useful and that you can choose the best iPad for you.
FAQs:
Apple pencil 1st vs 2nd generation: Which one is Better?
The Apple Pencil (2nd generation) is a significant upgrade over the first-generation Apple Pencil in terms of precision and responsiveness.
Apple Pencil 1st Generstion still delievers great drawing performance.
It doesn't have the extra button for quick actions. Plus, it's completely cylindrical with no flat edge, so it's prone to rolling on a flat surface.
You can only pair and charge it via Lightning or USB-C connector. There's no wireless charging support like with the newer Apple Pencil 2.
Do I need a matte screen protector for iPad when drawing?
The Apple Pencil is designed to be used without a screen protector, so it's depends on your preferences and habits.
All ipads feature a gossy screen surface that offers maximum clarity and color accuracy, but meanwhile it feels like you are drawing on slick glass.
If you like to use a matte screen protector to eliminate glare, fingerprint smudges, as well as emulate the pen on paper experience and provide a little resistance. we recommend you get one.
Do I need the Apple Pencil to draw on an iPad?
You'll definitely need some sort of stylus pen to properly draw on an iPad, It is much more precise than your fingers.
The Apple Pencil works great but sold separately! Luckily, there are plenty of third-party iPad stylus pens that can cost less but will let you draw and sketch with ease.
Can any iPad be used for drawing?
No, only iPad that compatible with apple pencil can be used for drawing.
If you're planning on getting the new iPad's models, then getting the Apple Pencil 2 is a must, here is the list of the compatible devices for the second-generation Apple Pencil:
iPad Pro 12.9” (3rd generation and later)
iPad Pro 11” (1st generation and later)
iPad Air (4th generation and later)
iPad mini (6th generation)
If you have an older model or are planning on getting one, check this list for the Apple Pencil 1 compatibility devices:
iPad (6th to 9th generation)
iPad Air (3rd generation)
iPad Pro 12.9-inch (1st or 2nd generation)
iPad Pro 10.5-inch
iPad Pro 9.7-inch
iPad mini (5th generation)
What's the best drawing/art app for iPad?
Procreate is the most powerful and intuitive intuitive digital illustration app, which is available only on iPad.
Aside from Procreate, there is Adobe Fresco, Clip Studio Paint, Sketchbook, Ibis Paint X, Infinite Painter, Medibang Paint, Affinity Designer, etc as the better of the bunch.
What is the best note taking app on iPad?
If you're looking to write notes by hand, Goodnotes and Notability are the two main apps.
Other well-known options including Apple Note, Bear, Evernote, OneNote, Nebo, Concepts and more.
Source: https://pctechtest.com/best-ipads-for-drawing-artists
 Bloggar | Slóð | Facebook | Athugasemdir (0)
27.12.2023 | 13:36
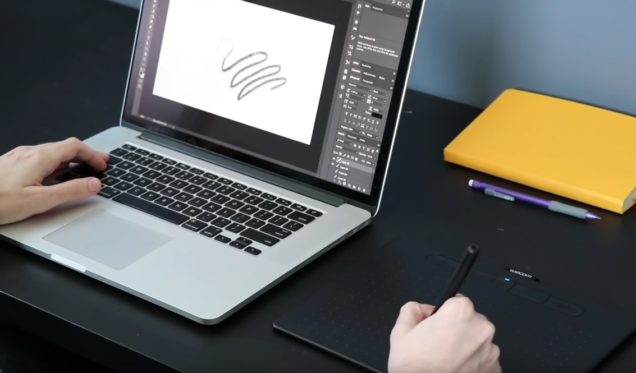
Best Wireless and Bluetooth Drawing Pen Tablets
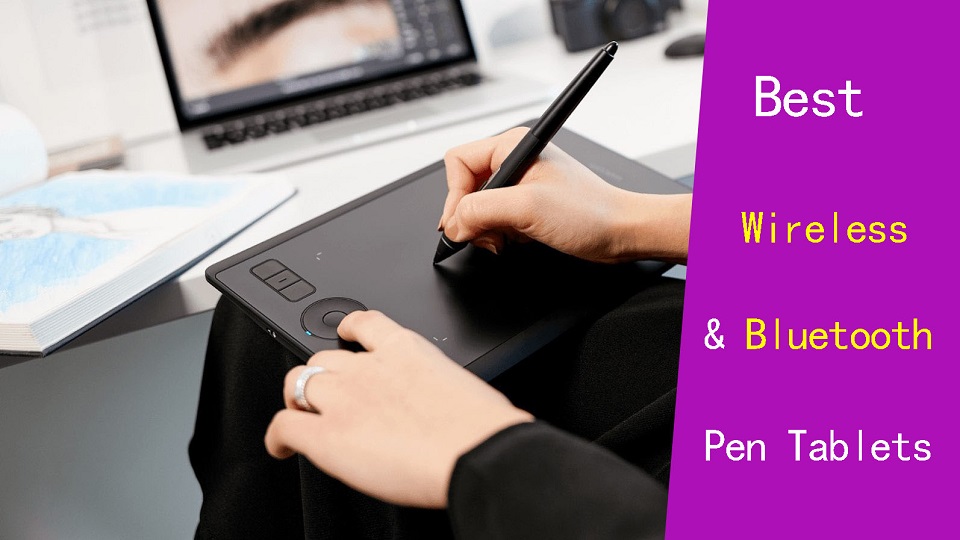
Wireless drawing tablets are great if you're trying to make a desk looks cleaner, or like drawing with your tablet on your lap.
Mobile productivity hounds who want gear that's ready for travel swear by them, too, and some models are able to be wireless, carried around by itself, and even let you draw directly on the screen.
Thanks to hyper-fast connections and long-lasting batteries, you no longer have to sacrifice some more practical functions to enjoy the freedom of using a wireless tablet.
In fact, they're so fast and reliable nowadays that even the hard-to-please artist crowd is beginning to embrace them.
These days, the pen tablet market offers plenty of wireless options, from basic non-screen units to standalone display tablets.
If you are a beginner and don't have much expertise, picking the best wireless bluetooth drawing tablets for your needs can be difficult.
In this article, we provide all the buying advice and deep-dive reviews you need to select the right wireless drawing tablet.
We've spent hours and hours researching each model, surfing the web, just to bring you a list of the very best wireless graphic tablets around.
What are the two types of wireless drawing tablets?
Bluetooth pen tablets connect with the device over Bluetooth completely wireless connection no need for a dongle.
But some wireless tablets work on 2.4 GHz radio frequency they need a dongle to insert into the USB port of the connecting device.
2.4GHz vs Bluetooth Connection: Which is Better or faster?
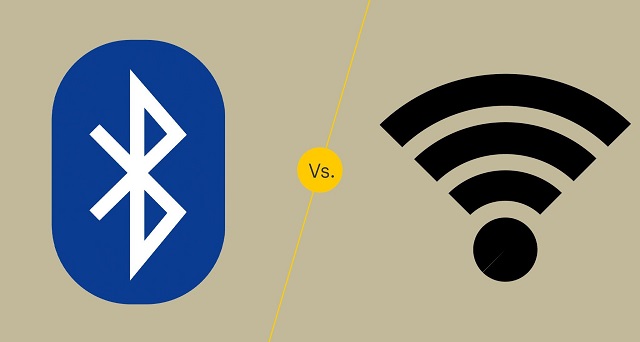
The answer depends on what the connection is used for, and what version of Bluetooth you're talking about.
2.4GHz will usually offer lower latency than Bluetooth but use more power.
Bluetooth technology has been refined over the years, but the older versions of it are still used for some applications. The different versions are numbered with the latest version being Bluetooth 5.
The later versions have significantly increased the transmission range as well as the speed and capacity of earlier versions.
In general, when shopping for Bluetooth drawing tablets, it's best to look for tablets using the latest version of Bluetooth.
What are the advantages of a wireless pen tablet?
Wireless drawing tablets are a great way to boost your productivity and comfort levels at work or home.
One of the main advantages of wireless pen tablets is that they eliminate the need for cables and wires that can clutter your desk and limit your movement.
With wireless connection, you can position your tablet wherever you want, as long as they are within the Bluetooth or USB range of your computer.
This gives you more flexibility to adjust your posture, angle, and distance according to your preferences and needs. You can also easily move your devices around if you need to change your location or work on different surfaces.
With no wires, there's little risk of damage or interference due to any accidental pulls or trips over cables!
And it is much easier to transport, since you don't need to worry about pesky wires and cables. This makes it perfect for people who need a mobile solution, such as students, business people, and more.
In addition, The wireless pen tablet also comes with a usb cable for easy plug-and-play in case your device doesn't have Bluetooth or the tablet itself is out of battery.
What are the disadvantages of using a wireless drawing tablet?
Wireless tablet require batteries, which can run out of juice at the most inconvenient times.
Compared to a wired tablet, Wireless tablet can sometimes have a slight delay in their response time, which maybe a disadvantage in situations where precise movements are required.
Wireless tablet can be susceptible to interference from other wireless devices, which can cause the tablet to malfunction or become unresponsive.
The final disadvantage to consider before purchasing a wireless tablet is that there are limited options on models.
Wireless tablets are still rather rare to the market so many of them are expensive and contain a lot of extra features that are not needed.
How to connect a bluetooth drawing tablet to a computer?
To connect your bluetooth tablet to a computer, first, ensure it has enough batteries.
Then, turn on the tablet and activate pairing mode, usually by pressing the "connect" or "pair" button.
Next, on your computer, go to the Bluetooth settings, search for available devices, and select your tablet from the list.
How to choose a wireless drawing tablet?
Apart from introducing a couple of new factors that you need to pay attention to (namely, connectivity and battery life), picking out the best wireless drawing tablet isn't all that different from choosing best pen tablet overall.
Wireless tablets that connect via a USB receiver or dongle can only connect to a computer or device if it has a USB-A port.
Bluetooth connectivity on the other hand does not require any dongle or extra receiver and can therefore easily connect to other Bluetooth-enabled devices without the need for any ports.
Likewise, battery life is another consideration. Be careful about what wireless tablet model you choose and how long their rechargeable lithium batteries last.
What are the 3 main types of graphic tablet? Does it support wireless connection?
In the world of graphic tablets you have three kinds: pen tablets without display, graphic tablets with display, and standalone drawing tablets.
1. graphic pen tablets
A non-screen graphic tablet consists of a pen and a plastic pad, with which you can perform various manipulations with information in various art programs.
Since your hand is on the tablet and your eyes are on a computer monitor, So screenless tablets are more difficult to use and take longer time to get used to.
They are a really good option for someone getting started in digital art. The main reasons for this is that they are much more affordable and quite durable.
This type of tablet has Wireless compatibility, You can often choose between a wireless or a wired only model.
Some of the most popular options include: Wacom Intuos, Huion Inspiroy, and XPPen Deco.
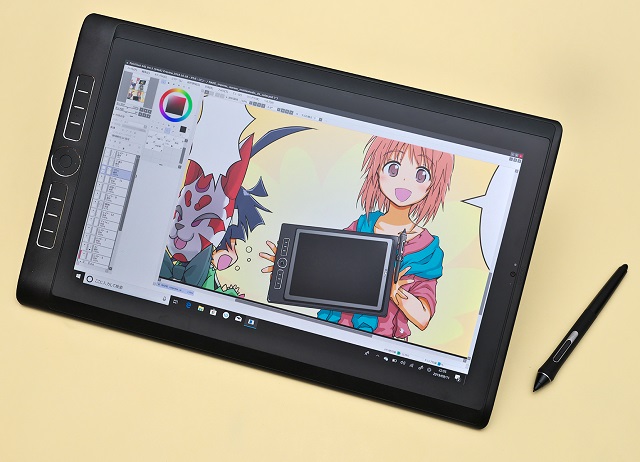
2. Pen tablets with screen
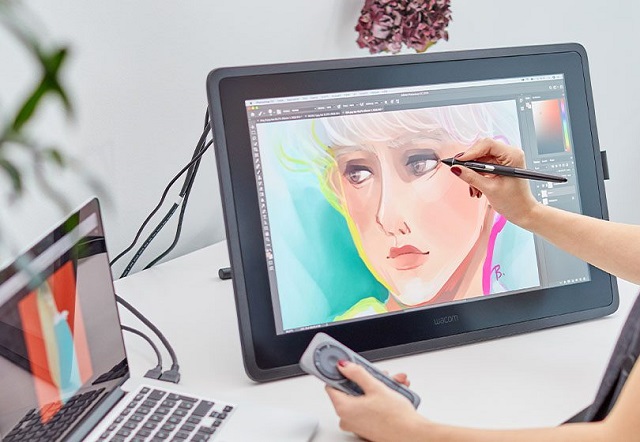
There are graphics tablets with screen available in the market. These devices are commonly referred to as "pen displays".
They combine the features of a traditional graphics tablet with the convenience of a built-in screen, allowing you to draw or design directly on the display.
There is a much smaller learning curve and it feels more natural from that perspective. However, Even if they have a display, you still need to hook them up to a computer, so not portable.
They are essentially secondary computer monitors you can draw on. These tablets doesn't have computing units like processor, RAM, storage, battery, and OS inside.
No such "wireless pen display" exists yet, as the amount of data that would need to be transferred wirelessly to get a FHD~4K display to operate unwired from an actual computer is too great.
At the top of this category are the Wacom Cintiq, Huion Kamvas and XPPen Artist. They come in all sorts of sizes with all sorts of options. Every extra, whether it be a bigger screen, or higher resolution functionality, will drive up the price point.
3. Standalone Drawing Tablets
They are powerful and costly machines that act as a full workstation all their own, allowing you to draw without the aid of any extra devices.
Brands like Wacom and Huion offer Dedicated all-in-one tablet workstations (Windows 11): Wacom MobileStudio Pro 13/16, and Huion Kamvas Studio 16 — essentially display tablets with built-in PCs.
Regular consumer tablets have come a long way, Apple's ipad Pros (iPad OS), Samsung's galaxy tabs (Android), and Microsoft's Surface Pros (Windows 11), with its special attention to artistic endeavors - support pen input, has garnered a passionate following.
All these independent drawing tablets can be used wireless, and portable, making them a convenient option for artists who want to create digital art while traveling or away from a computer.
The problem is the software available is limited - especially on android and ipad os, super expensive price, the pressure points on regular consumer tablet are not as good as professional ones.
10 Best Wireless drawing tablets

Here are our top 10 picks for the best wireless drawing tablets with or without a display built in:
1. Ugee S640W
2. XP-Pen Deco MW
3. XP-Pen Deco Pro MW
4. Huion Inspiroy Dial 2
5. Huion Inspiroy Q11K V2
6. Wacom Intuos
7. Wacom Intuos Pro
8. iPad Pro
9. Samsung Galaxy Tab S9
10. Surface Pro 9
Conclusion
Want to work or play without cables getting in the way? Wireless graphics tablets are becoming increasingly popular due to their mobility and flexibility.
These 10 best Wireless tablets are in different price brackets. Each has particular benefits and a lot will depend on your budget, preference, work type and skill level.
If you have the money for it, wireless standalone tablets with screen would be the best, most natural-feeling option for a mobile solution.
It doesn't matter if you pick the iPad Pro, Samsung galaxy tab or the Surface Pro 9, you will have a wonderful machine to work with.
In case you're a beginner or an intermediate-level artist, sticking to the budget wireless screenless pen tablets is probably a good idea.
They are unbelievably affordable and will still allow you to create artwork as good as anything created with a super expensive tablet.
It's up to you to decide which one best suit you.
Source: https://pctechtest.com/best-wireless-bluetooth-graphic-tablets
Bloggar | Slóð | Facebook | Athugasemdir (0)
25.12.2023 | 06:24
Whats best drawing pad for Inkscape?
Inkscape is a free but powerful vector graphics editor, and for the best performance, you'll want a pen tablet that can handle its requirements smoothly.
It is very hard to create or design with a mouse and a keyboard. But drawing tablets allow you to create freehand digital art the same way you would with a pencil and paper.
If you are a designer or illustrator looking for the best drawing pen tablet for Inkscape, you may be confused as there are so many different brands, models, and types on the market.
Which one is the best suits your needs or budget? What do these drawing tablet features mean? That's why we've made this article, to ensure you get the best option for you.
In this post, we'll go into the realm of tablets and take into account a variety of variables, such as display vs non-screen, pressure sensitivity, performance, software compatibility, and brand, to assist you.
What is Inkscape?
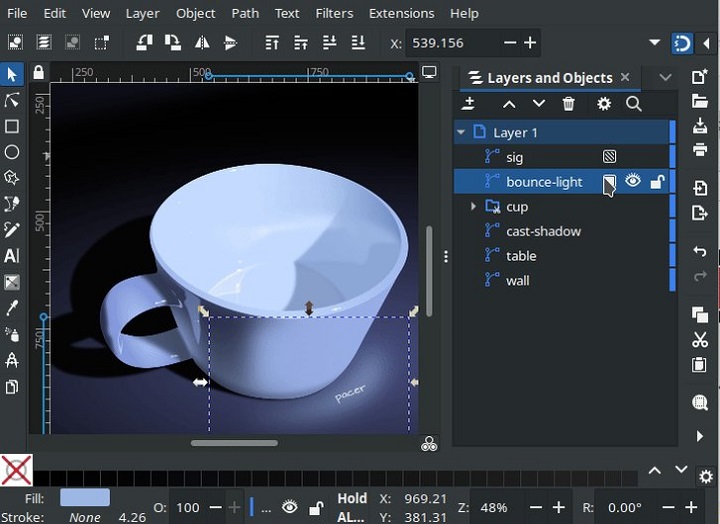
Inkscape is a great free and open source program for creating vectors (scalable graphics that won't blur when you resize them).
It offers a stable, transparent, consistent and easy-to-customize user interface, along with a wide variety of vector editing and designing tools.
Your basic toolset includes creating straight lines, freehand lines, shapes, 3D boxes, Bezier curves, spirals, text editing, and so much more.
You can add layers, color fills, and even effects to your drawing such as blurs, bevels, shadows, textures, glows, and so on.
Additionally, it includes an extension-based approach that makes it simple to add new features, and there are several incredible ones available.
The many effects and advanced, industry-grade options available in Inkscape are numerous. such as alpha blending, cloned objects and markers. It comes with multiple gradients and helps you create complex combinations too.
The items you create in Inkscape are in the SVG file format, but you can also export in PNG, OpenDocument Drawing, DXF, sk1, PDF, EPS, and PostScript.
Because Inkscape is compatible with several formats, and you can transform your designs with 3D effects, filters, pixelation, blurring and more.
You can use it to create a business card, logos, online graphics, user interface, poster, paper scrapbooking, flyer, or just to practice your skills.
Is Inkscape as good as Adobe Illustrator?
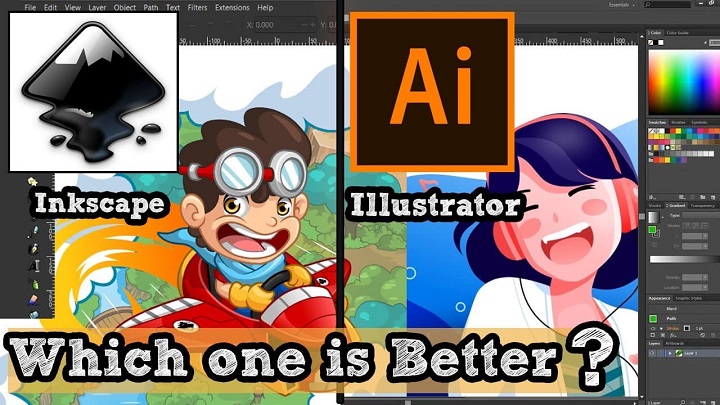
Inkscape offers a completely free way to create vector images, while Adobe Illustrator is really expensive with Subscription model.
Although not quite as feature-rich as Illustrator cc, lacks polished look, Inkscape is still exceptionally full-featured and considered as a popular alternative application to Illustrator.
The main disadvantage of Inkscape is that it does not support CMYK colours for print, It's RGB only. However you can export a design as a PDF from Inkscape, and then manually change the colors to CMYK using other free programs like Scribus.
Plus, since the software is open-source, it has a thriving user community. Along with that large community, comes many helpful Inkscape tutorials.
The designers familiar with Adobe illustrator can efficiently operate this tool. Once you get past the steep learning curve and outdated interface, you'll master this excellent software to creat stunning artwork.
Why get a Drawing Tablet for Inkscape?
A drawing pad with pen is essentially replaces a mouse while you are working with graphic design application like Inkscape.
Mouse might be faster initially but the pen tablet has some innate advantages, which once mastered can speed up your workflow very much.
A digital stylus mimics the feel of a traditional pen or a brush. You have more control in moving vectors, nodes and vertices in graphics. The whole process feels faster, smoother, more accurate, natural and intuitive.
Digital pens support both pressure sensitivity and tilt recognition when drawing. This means the on-screen brush will respond to whether you press or tilt the pen and adjust the brush accordingly. This gives a natural and accurate feel when painting.
Certain tools like the Freehand Lines tool or the Calligraphic and Brush Strokes tool in Inksape become easier to use if you have a tablet. Also, the very common task of tracing a drawing to convert it into digital is easier.
A tablet can also save you time and effort, as you can switch between different tools or menus with the hotkeys, This seems like the better choice for efficiency.
Getting from one corner of the screen to the oposite one with precision is way faster than with a trackpad / mouse and it's always in one wrist move.
Not only will drawing with a mouse produce worse results, it is also very hard on your wrists. In contrast, a tablet can reduce the risk of strain or injury on your wrist, hand, and arm, as you can adopt a more ergonomic posture and movement.
How to choose the best drawing tablet for Inkscape?
While every tablet may have comparable benefits, not all tablets are created equal—so which tablet is best for drawing & designing in Inkscape?
You need to focus on several key features and functionalities before buying, such as tablet type, tablet size, pressure sensitivity, tilt sensitivity, stylus pen, brand, price and more.
1. Types of tablets
There are three different kinds of tablets suitable for creative work: pen tablets, pen displays, and standalone pen tablets.
You'll have the opportunity to choose between a wired and wireless tablet, a screen or non-screen, when you go to purchase one.
Pen Tablets without Screen
These are the most accessible and basic models, which don't include a screen, so an additional monitor would be a necessity.
The active area portion of the tablet corresponds with your screen, Drawing on the tablet with your pen registers on your computer screen.
It's a bit unnatural at first because of Hand-eye separation, but with time, patience and some practice, you will get used to it quickly.
Compared to tablets with screen, these screenless tablets are more affordable, portable, durable and have wireless compatibility.
If you want a screenless drawing pads for beginners, the Wacom Intuos, Huion Inspiroy and XPPen Deco are all good choices.
Pen Display Monitors
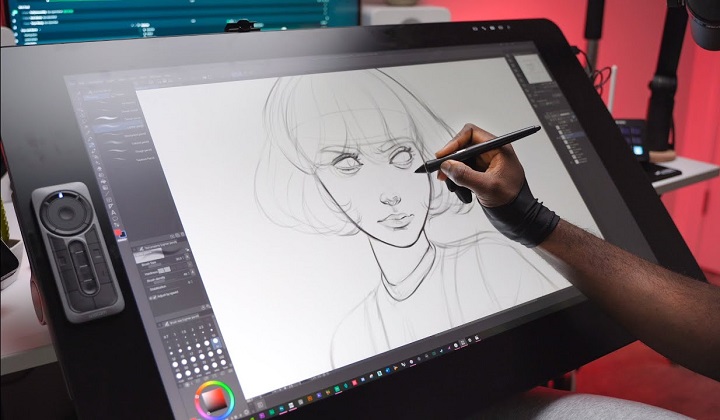
Working with the same technology as pen tablets but with the advantage of a built-in interactive display, pen displays are the favorite option of many professional artists and designers.
Pen display monitors usually come in sizes range from 10-inch to larger 32-inch. You can draw directly on the screen, exactly like draw on paper, or canvas, and it feels more natural and intuitive than non-screen type.
They do more expensive than non-screen tablets, still need a computer or a laptop to work and are not as portable as standalone tablets, however, they will considerably improve your working experience.
Buy a decent tablet with screen, the usual recommendation is the Wacom Cintiq, Huion Kamvas or XPPen Artist.
Standalone pen tablets
Not everyone wants a tablet as an accessory that connects to their computer.
Some prefer a standalone computer drawing pad, which has powerful internals, screen and os, a decent battery life, doesn't require a computer to operate, supports pen input.
If portability is your top concern, go for the standalone tablet. It's the best device to just pick up and draw anytime, anywhere.
Some popular options include the Apple iPad Pro (iPadOS), Samsung Galaxy tab (Android), Microsoft Surface Pro (windows), etc.
These are pretty expensive but a good option if you are earning money from your art.
2. Tablet Size
Graphic tablets come in many different sizes. The active area is the portion of the device that is sensitive to signal from a stylus. Usually, the larger sizes have a larger price tag.
Professionals prefer larger sizes while casual users find the smaller tablets sufficient for their needs.
The size of the tablet you use is largely influenced by your drawing style. People that draw with large gestural lines need a larger tablet and vice versa.
In addition, you also need to consider the size of your computer screen, working space and Portability. Larger tablets may tend to take more of your desk space and less portable.
3. Pressure Sensitivity
Pressure sensitivity means that the thickness of your brush stroke will differ depending on how hard or soft you push down the stylus on the tablet surface while drawing.
Generally, tablets have pressure levels starting from 4,096 all the way to 8,192. A higher level of pressure sensitivity allows for more precision and control when drawing.
Ideally, you'd want to find a tablet with a 8,192 pressure range if you're buying the tablet for illustration or design work.
4. Tilt Sensitivity
Tilt sensitivity on a drawing tablet refers to the ability of the tablet to detect and respond to the angle at which the stylus is held.
This allows for more natural and varied brush strokes, as the tilt of the stylus can affect the width, opacity, and other characteristics of the digital brush.
5. Express keys
More and more tablets are designed with Programmable buttons built into the tablet, usually on the side.
Instead of manually switching between tabs and apps, or simply selecting brushes in inkscape, these hotkeys will help you save time and streamline your work process.
6. Stylus
Stylus (pen) comes in two forms: battery-operated (AES) and electromagnetic resonance (EMR), but they're both designed to mimic the feel of pen on paper.
The Apple Pencil, Surface slim pen 2, along with a few third-party styluses, comes with built-in lithium battery, needs to be charged. Usually, the pen is sold separately from the already-expensive tablet.
Wacom, Huion, and XPPen and other professional drawing tablet brands, includes an EMR stylus with your purchase.These pens are battery-free, meaning it doesn't need to be charged.
7. Software Compatibility
Inkscape runs on all 3 main desktop operating system Linux, MacOS and Windows.
Thankfully, drawing tablet is designed to be used with a Windows or Mac computer, so it works seamless with Inkscape most of the time.
Note, since Inkscape isn't listed on the Google Play store and Apple app store, it won't work on any iPads and android based tablets.
So if you want a portable standalone drawing tablet for Inkscape, get a windows OS tablet, like microsft surface pro, Wacom MobileStudio Pro, and Huion Kamvas Studio 16.
8. Brand
Wacom, Huion, and XP-Pen are top 3 popular brands of graphic tablets that are used for drawing, sketching, and digital art.
Wacom is generally considered to be a high-end brand in the world of graphics tablets and they are known for their high-quality drawing experience and build quality, but they tend to be more expensive.
Huion and XP-Pen are considered as budget-friendly alternatives, they provide similar functionality and drawing experience as Wacom but at a lower cost. Many users find that they offer good value for the price.
Other less well-known brands include Ugee, GAOMON, Veikk, Xencelabs, Parblo, which also offer budget-friendly options for beginner artists and hobbyists.
If you want a more portable device for your artwork, then one of the best tablets from the likes of Apple, Microsoft and Samsung is likely to be a better option.
They offering fewer drawing-specific features but greater portability and everyday uses.
How to Use a drawing tablet with Inkscape ?
Here's a general process for using a graphics tablet in Inkscape:
Set up your graphics tablet: Connect the tablet to your computer using a cable or wirelessly, depending on the tablet model.
Install any necessary drivers or software provided by the tablet manufacturer. you can download from their official site.
Configure tablet settings: graphics tablets come with customization options, such as pressure sensitivity, buttons, or tablet mapping.
You can typically access these settings through the tablet's software. Configure the settings according to your preferences and the capabilities of your tablet.
Launch Inkscape: Launch Inkscape and create a new document, or open an existing one.
Select a drawing tool: Choose a drawing tool from the toolbar, such as the Pen tool or Pencil tool. You can also use the Brush tool or any other tool that allows you to draw or paint.
With the brush or pen tool selected, you can now start drawing on the canvas using your graphics tablet.
Customize brush settings: Inkscape provides various brush settings that you can customize to achieve different effects. You can adjust the brush size, shape, hardness, opacity, and other parameters using the brush options in the Control panel or the Brush panel.
Practice and explore: As you gain familiarity with your graphics tablet and Inkscape, continue to practice and explore different techniques to refine your digital drawing skills. Experiment with different brushes, textures, and effects to create unique artwork.
Pen Pressure not working in Inkscape ?
If you're on Windows OS and use a wacom tablet or alike, The troubleshooting solutions mentioned below should work.
Uninstall current wacom tablet driver and Install latest Wacom tablet driver.
Open Wacom settings. In the Mapping section:
Set Mode to "Pen". Then Select "Use Windows Ink".
In the Pen section:
Set Tip Feel somewhere medium-to-firm, to prevent maxing out pressure even with a light touch.
Set the function of the pen tip to "Click".
Open Inkscape, go to Edit > Input devices...
Make sure your Tablet is visible in the list of input devices.
If Tablet is not visible at all, close Inkscape, make sure the tablet is plugged in and functioning in other programs, then re-open Inkscape.
Select "Use pressure-sensitive tablet" and click Save, Restart Inkscape.
Select the Calligraphy tool (key C), From the top tool settings bar, click the icon of a down arrow pointing at a ramp. This enables pressure for this particular calligraphy preset.
Is pen tablet a must for graphic design and Inkscape?
Not every designer needs a graphics tablet, it's certainly an option, not a requirement. It depends on the type of work you will do in Inkscape and othe design programs.
If you're interested in learning graphic design and Inkscape, start with mouse and keyboard only. A majority of the functions in Inkscape is done with that only.
The tasks like web design, layout design or UI/UX design, you can do without a pen tablet. It will not make your work flow better/easier if you had one.
If you plan on making illustrations, do lineart/freehand drawing, it will be extremely time taking and difficult to do so without a graphics tablet.
Conclusion
Using a graphics tablet with Inkscape, Gimp and Krita allows you to draw, edit, sketch, and create digital artwork with more precision and control.
In fact, the suitability of drawing tablets depends on the requirements, comfort, and budget of a graphic designer.
If you're traveling a lot, working on trains, and doing a lot of sketching — a standalone tablet like microsoft surface pro might work great for you.
On the other hand, if you're primarily based at your desk, plus require pen tilt, and pressure — a tradition pen tablet and pen display might be a better choice.
Anyone who is new to graphic design, illustration, or on budget can make use of the pen tablet without screen.
If you want to step up your comfort level of drawing, a tablet with screen is the go-to choice for you.
Source: https://pctechtest.com/best-drawing-tablet-for-inkscape
Bloggar | Slóð | Facebook | Athugasemdir (0)
12.12.2023 | 08:49
XPPen Artist 24 Pro vs Wacom Cintiq Pro 24 Comparison
Want to get serious about digital art? Want to upgrade from a non-screen tablet, a small pen display, or an old wacom cintiq model?
The 24-inch pen display monitor is a great tool for professionals and mid-level artists who want to take painting to the next level and draw directly on the big screen.
XP-Pen Artist 24 Pro is what many artists calls a budget alternative to the Wacom Cintiq Pro 24—a much more expensive and feature-rich tablet for the pro market.
Which one has better screen quality, best drawing experience & longer life span? and Which one is worth buying? Is Wacom Cintiq really better than XP-Pen Artist?
In this article, we would discuss the key differences between them and help you decide which one will fit your needs better.
Wacom Cintiq Pro 24 vs XPPen Artist 24 Pro Comparison– which one is worth buying?
Taking a closer look at the specifications of the two tablets, it gets easy to spot the key differences between them.
Below is a more in-depth analysis, These will help us better understand the pros and cons in each case.
Design and Build Quality
XP-Pen Artist 24 Pro is composed of a vast 23.8-inch glass screen, side buttons and an immense adjustable stand. Build quality is great and doesn't look and feel cheap.
The massive Wacom Cintiq Pro 24 feels robustly built and features a clean “minimalist” design aesthetic. You will notice that there is a lot of empty space around the 23.6-inch screen (bezels).
This leads to the tablet taking a lot more space on your table. But it's also incredibly comfortable to lay your arm on, and you can travel the full surface of the display without interrupting your pen stroke.
Cintiq Pro 24 has no ExpressKeys built into the sides like the Artist 24 Pro does. It also doesn't include an adjustable stand instead 2 folding legs at the back that will raise it up to a 20 degree angle.
Both tablets are big and heavy, less portable. If you're going to invest into a graphics tablet this size, make sure you have sufficient desk space to accommodate it.
Screen Resolution, Brightness and Color Gamut
Artist 24 Pro features an IPS display with 2K (2,560 x 1,440-pixel) resolution at 123 PPI, 250 nits max brightness, 16.7M colors and 90% Adobe RGB color gamut.
The screen looks nice and sharp, Colors are bright and vibrant. you can zoom around and work on the small details of your art.
However, the Cintiq pro 24's display offers higher 4K (3840×2160-pixel) resolution at 188 PPI, a billion colors, 350 nits max brightness, and covers a wider color accuracy of 99% Adobe RGB.
This means sharper and truer color representations illustrations, photographs, and video on Cintiq Pro 24.
In addition, Wacom Cintiq Pro 24 comes with a screen calibrated in the factory, meaning that you don't have to mess around with calibration hardware.
You will likely need to perform some calibration with the XPPen Artist 24 Pro, the same as you would for a monitor.
Screen Lamination
Cintiq Pro 24's screen is fully laminated, This means an improved display quality, reduced glare, wider viewer angle, more accuracy (no cursor offset/parallax from the pen tip), and better overall usability or user experience.
In contrast, Artist 24 Pro does not come with a laminated screen, But parallax is improved with newer screen technology, which is very minimal. After calibration, you can get the pen cursor to appear directly beneath the pen tip.
Surface Texture
Surface texture makes a huge difference in your drawing experience.
This is one of the main differences between the two tablets.
Cintiq Pro 24 has a matte etched glass surface, whereas the Artist 24 Pro uses a matte screen protector.
The etched glass will have a bit more paper-like texture, and even less slippery. Matte screen protectors are less durable, and have a much slicker feel.
Multi-Touch
It is worth noting that the XPPen Artist 24 Pro is not a touch screen.
There are two models of the Cintiq Pro 24, with and without multi-touch. The touch version costs $500 more than its sibling.
The most useful gestures were two-finger actions: pinch to zoom in / out and rotating the canvas. These two commands worked almost flawlessly.
But any action that required more than two or three fingers became quite cumbersome. of course you can always disable them by press the button.
Wacom Pro Pen 2 vs XPPen PA2 Stylus
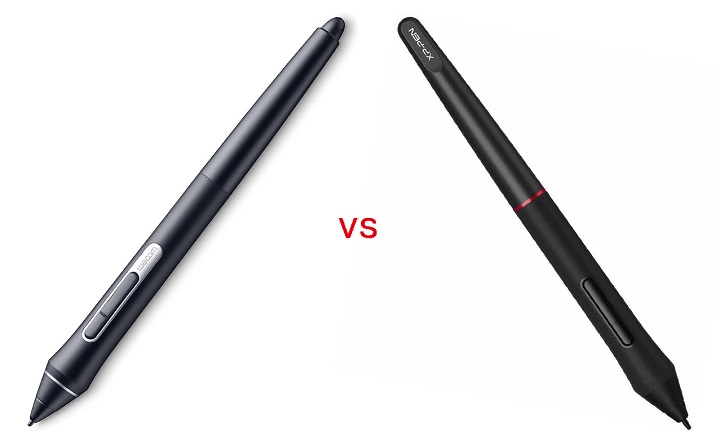
Wacom Pro Pen 2 and the XPPen PA2 stylus look very similar to each other. They both have a rubber grip at the front body for a better hold.
Wacom pen has two buttons on the side and an eraser at the back whereas XPPen stylus has two side buttons with no eraser at the back.
XPPen Pa2 stylus is light and more front heavy. Wacom pen is more back heavy and more heavily weighted in general.
Both styluses are battery-free, doesn't require charging, supports 8,192 levels of pressure sensitivity and 60 degrees of tilt recognition.
This means that it's easy to draw a line that smoothly varies between thick and thin as pressure is applied—or not—much like a brush.
The main difference was that XPPen PA2 stylus seems to take slightly more initial activation force than Wacom to draw, Tilt sensitivity is also sometimes a bit flaky.
In contrast, Wacom Pro Pen 2 feels more natural and accurate, it responds more predictably to the pressure you apply to it.
Overall the XPPen PA2 is a good stylus, but the Wacom Pen offers better drawing experience.
Shortcut Buttons
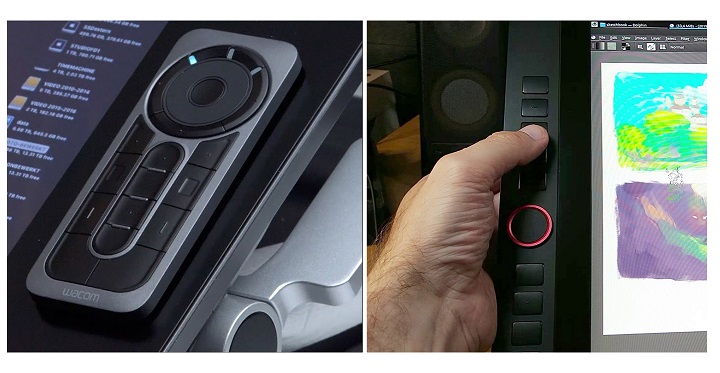
The Artist 24 Pro has two sets of keys, a red roller wheel and ten buttons on each side, making life equally convenient for lefties, righties, and the ambidextrous.
They mirror each other, so there are a total of 20 programmable keys and 2 dials. These are all on the outside, slightly raised.
The Cintiq Pro 24 has no Express Keys, But it comes with a wireless Express Key Remote via 2.4GHz Wifi.
This hand-held device provides 17 programmable shortcut function keys while working. There's a rotation wheel at the top that allows zooming in and out (or other customizable functions).
The remote is perfectly balanced for either right or left-handed people. It will magnetically stick to either side of the display keeping it handy at all times.
Compatibility and Connectivity
Both Cintiq Pro 24 and Artist 24 Pro are compatible with the popular operating systems Windows, Mac and Linux. They works well with a multitude of software packages that range from popular professional suites such as Photoshop and ZBrush, to freeware such as Krita and Blender.
The Cintiq Pro 24 and Artist 24 Pro can be connected as a display through HDMI, or USB-C, if your computer supports the ports.
If you are connecting the display through HDMI, you'll also need to connect one cable for power, and an additional USB-A cable for the pen data transmission, total 3.
The USB-C connection only requires 2 cables: a single USB-C cable + one cable for power.
Drivers & Software
Both units come with windows, mac and linux drivers to communicate with your computer. You need to download them from their official site.
The driver from Wacom is one of the most reliable options on the market. It comes with some advanced shortcut controls that are easy to understand and quick to setup.
The driver from XPPen may not be as advanced as the Wacom driver and may count more issues in some cases. but nothing you couldn't work around or just ignore.
XPPen driver has plenty of customization options. You can use it to customize physical shortcut buttons, calibrate the onslaught of the pen and screen, set the work area and export / import your settings.
Something we did notice is that both Wacom and XPPen driver software have 3-point calibration for the stylus' pressure sensitivity, which is great to get your pressure just right.
Tablet Stand & VESA Mount
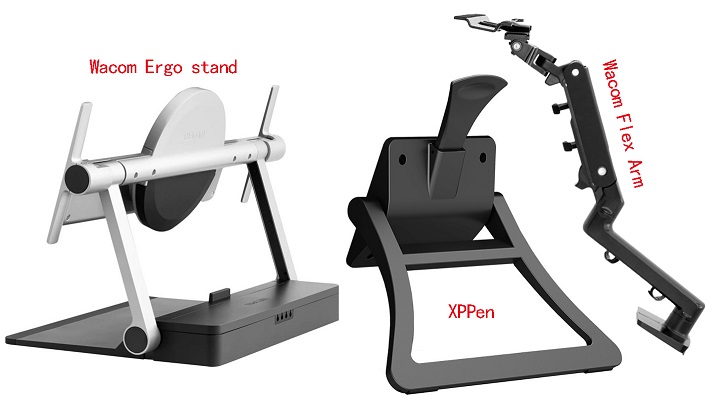
The size of these 2 tablets are massive, so be prepared to make a bit of desk space available.
If you don't have much desk space, you might need to buy a VESA mount or arm to hold up the monitor in a comfortable position to draw on.
Artist 24 Pro's adjustable stand is strong, wobble-free, and already attached. Both the stand and bottom of the display have rubber feet to help prevent slipping on a desktop—a thoughtful touch.
The stand uses a standard 100 x 100 mm VESA mount, so it can be easily removed for attaching the display to a VESA arm mount if desired.
Even though Cintiq 24 Pro does come with the 2 legs to help prop it up, it’s still not enough. Having to hunch over when you draw/animate does numbers on your back.
Luckily, An optional $500 Wacom Ergo stand or $400 Wacom Flex Arm is available - It has an unique 80x495mm hole pattern at the back.
Wacom Ergo stand has raise, tilt and rotate mechanisms for adjustable positioning, so you can change angles easily while working on complex illustrations.
The Flex Arm allows the Cintiq Pro 24 to be positioned just about anywhere you want at any angle you want.
Wacom Pen Stand vs XP-Pen Pen Holder
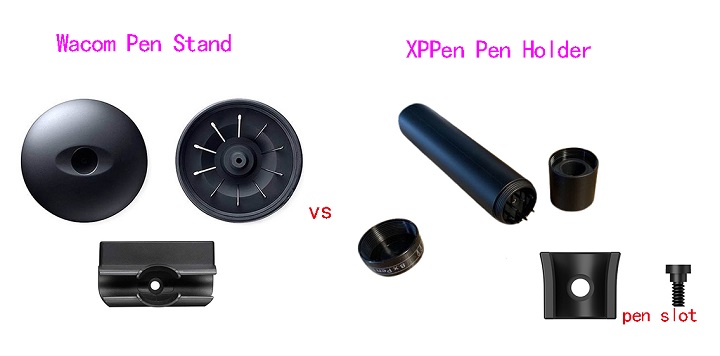
Cintiq Pro 24, comes with a pen stand, which is shaped like a donut. It allows you to keep your stylus in a horizontal or vertical position when not in use.
Opening the top cover you get a total of 10 extra pen tips: 6 standard and 4 felt. There's also an extra pen holder that snaps to the top of the display.
With Artist 24 Pro, you get a cylindrical pen holder, which works as a pen storage.
The front cap of the pen holder works as a pen stand, while the rear cap of the pen holder provides safe storage space for 8 extra standard Pen nibs.
There's also a small plastic pen slot that screws into the side of the tablet to hold the stylus safely.
Cooling
There is an intermittent fan regulates the temperature of the Cintiq 24 Pro. The fan speed varies depending on the demands placed upon the monitor. Fan is quite loud at times.
XPPen Artist 24 Pro has no fans, so it is quiet with zero fan noise, which will certainly help users stay concentrated without the droning.
Price
The Artist 24 Pro retails for about $899 USD and Wacom's Cintiq Pro 24 sells for $1,999! That's quite the price jump to account for.
So let's just get this right out in the open. There are a lot of people who are looking for cintiq alternatives as Wacom's tablets are expensive.
Besides,The Huion Kamvas Pro 24 (4K) with cheaper price is also really excellent and almost as good as wacom cintiq Pro 24.
Related Posts: XPPen Artist 22R Pro vs Wacom Cintiq 22 Comparison, Wacom Cintiq Alternatives, PDF Annotating Tablets.
Conclusion
While it may be bigger than you'd need, The 24-inch pen display is generous enough to feel the freedom of drawing and move your hand with the pen around the screen without any problem.
The Wacom Cintiq Pro 24 simply outdoes the XP-Pen Artist 24 Pro in all aspects because it offers extra features like multi-touch, higher pixel density, longer warranty - 2 vs 1 year, etc.
Only downside is that it's expensive. If you're a serious artist, designer or 3D modeller, and money is no object, you'll struggle to do better than the Wacom Cintiq Pro 24.
The XP-Pen Artist 24 Pro offers amazing value for the money, with everything you'd need to take the next big step in their creative journey. And the price is more than acceptable for most artists.
Ultimately, It really depends on your budget, preference, needs and skill levels. We noticed that for many beginner artists using the Cintiq Pro 24 is unnecessary. Some of them don't even use the advaned features.
We look forward to seeing how Wacom, and XP-Pen will continue to grow their product line with graphic displays that can attract larger demographics.
Source: https://pctechtest.com/wacom-cintiq-pro-24-vs-xppen-artist-24-pro
Bloggar | Slóð | Facebook | Athugasemdir (0)
9.12.2023 | 01:53
Beginner guide to become a digital artist
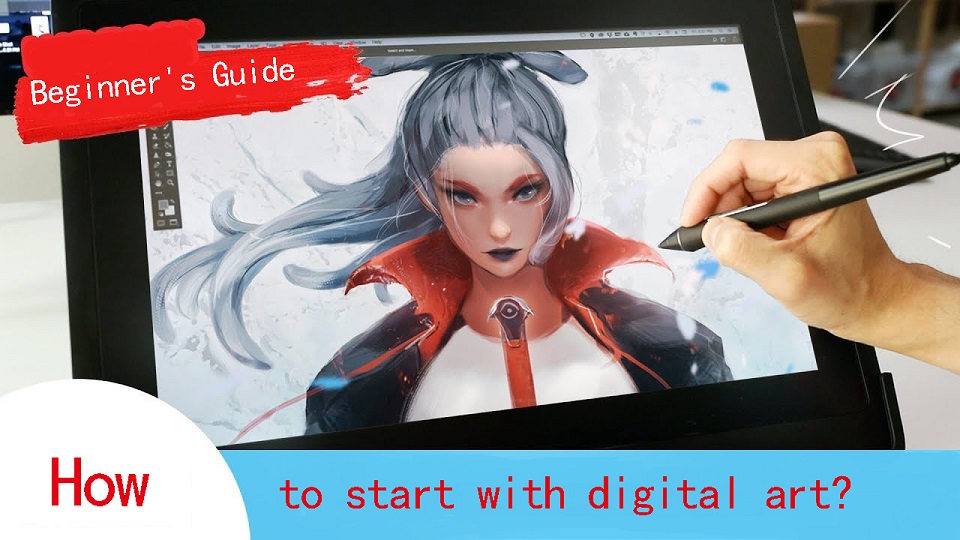
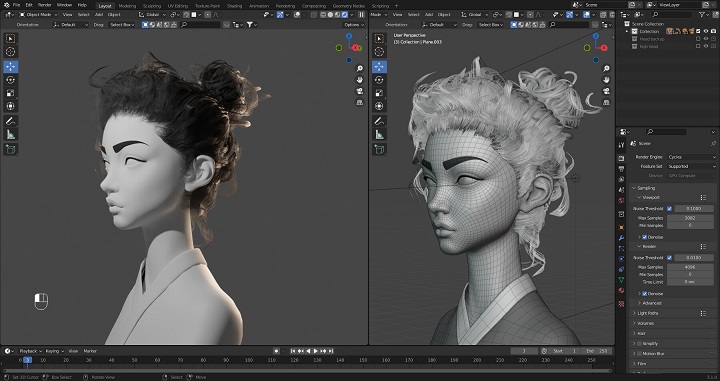
Nowadays, it seems that digital art is everywhere on the internet. There are dozens of types of digital art, ranging from digital painting to 3D animation.
Have you ever wondered how you can turn your creative ideas into stunning digital art? Anyone can be an artist in this digital age.
But getting started can be overwhelming. How do you begin? Fear not— it's easier than you think!
By providing an easy-to-follow beginner guide to start digital art, this article empowers newcomers to understand the types of digital art, choose the right tools and software, and where you can proudly display your masterpieces.
What is digital art?
Digital art is a contemporary artistic medium that encompasses a wide range of creative works produced using digital technology.
It is the fusion of traditional art techniques with the digital tools and techniques made available by computers, graphic tablets, and software applications.
Digital artists use these tools to create, manipulate, and enhance their artwork, resulting in a diverse spectrum of visual expressions.
The fundamental characteristic of digital art is the use of a digital canvas, such as a computer screen or graphic tablet, combined with digital drawing tools like styluses and pens.
This allows artists to paint, draw, sculpt, and design with remarkable precision, flexibility, and efficiency.
The artistry in the digital realm comes to life through the manipulation of pixels, vectors, and layers, making it a versatile and dynamic medium.
Different types of Digital Art
There are many different types of digital art, including animation, drawing, photo manipulation, 3d modeling, and more.
1. Photo Manipulation
Photo Manipulation is pretty simple — editing an image to whatever you want it to look like. Since you're using photos, this is a pixel-based, or raster, type of digital art.
There are subtler versions of it, like touching up a family portrait and fixing lighting and a few facial blemishes, and more prominent versions of photo manipulation, like combining a picture of a pirate ship and some planet images into a space pirate sci-fi scene.
2. Digital Illustration
Digital illustration, graphic design, and vector art is all around you, even if you don't notice it. It's in apps and app icons, websites, manuals and brochures, and even books.
This type of digital art is made of shapes all layered together to create an image like a flat illustration — shape/vector based, not pixel based. It's often used for branding and logos, and creates clean and crisp art.
3. Digital Painting
Digital painting is probably what pops into your mind when someone says ‘digital art'. It's raster/pixel-based, like photo manipulation, but unlike photo manipulation, which combines and edits images to bring them together.
with digital painting, you're creating something from a blank canvas. It's basically just drawing/sketching/painting digitally, and usually depicts characters, landscapes, and scenes.
4. Animations
Moving images or a series of drawings that come together to create motion. This includes everything from animated movies to GIFs you see online.
5. 3D Art
3D art is becoming more and more popular — it's graphics are being used in websites, apps, and interfaces in every category and subcategory.
3D modeling also has a huge role to play in the video game industry, as well as animated shows and movies. 3D models are digital objects that can be rotated and viewed from all angles. They're often used in games, movies, or product designs.
Choosing the hardware to get started with digital art
First thing you'll need when you want to get started making digital art, is hardware. There are two main options: computer + drawing tablet, standalone pen tablet.
1. Computer
If the art program is heavy, your computer may use too many resources and you may end up getting lags while drawing.
This depends on the specifications of your computer; if it is a high-end one with the best in class CPU, GPU and copious amounts of RAM, then no need to worry!
Depending on your software, you would generally want a computer with:
-At least 16GB of RAM
-A discrete GPU separate from your CPU
-At, least an Intel Core i5 or Ryzen 5, or something equivalent
-You can also ignore all of these if you have a apple Mac with the M1 or M2 Processor.
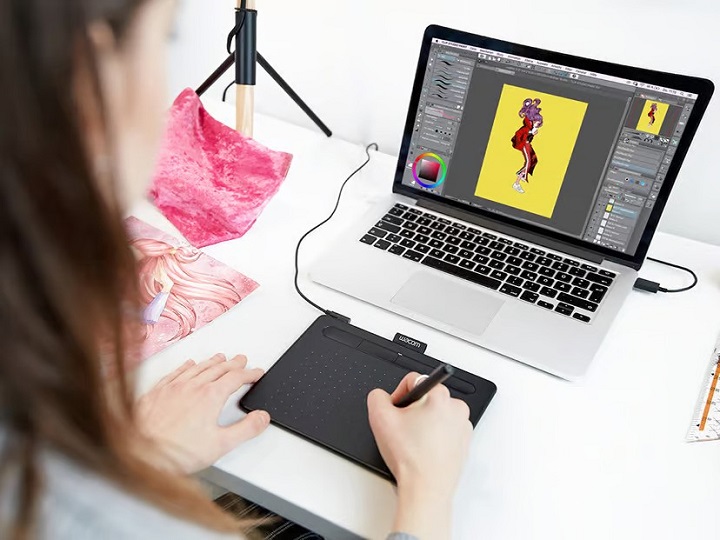
2. Drawing Tablet
You can make digital art with a mouse, But a pen tablet with pressure sensitivity will give a much more natural feel when drawing.
Some things you want to focus on are: Drawing surface size, Pen, Pressure sensitivity, Express Keys, and Price.
There are two main categories of graphics pads for beginners: tablet without screen, tablet with display.
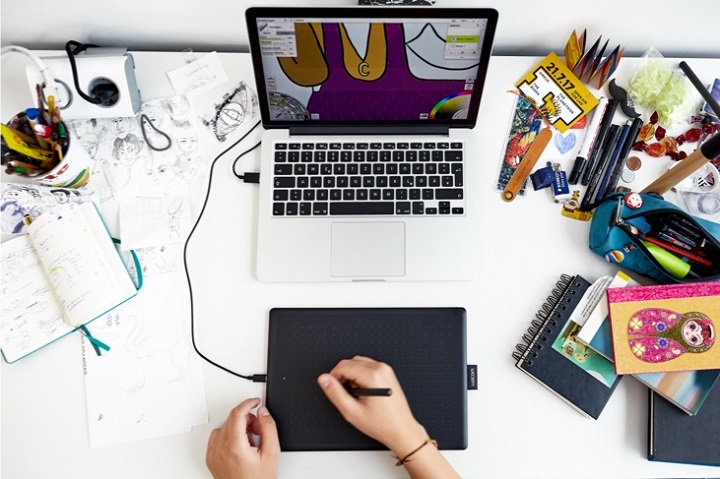
A non-screen graphic tablet have two components: a touch-pad, and a stylus. It works a bit like a mouse and needs to be attached to your PC or laptop.
In order to use the tablet, one needs a good sense of hand-eye coordination. These types of tablets are usually cheaper, but offer everything you would need to draw digital art.
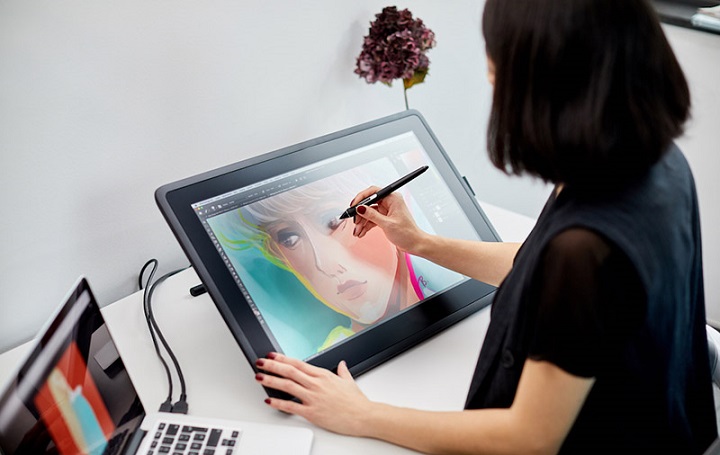
Display tablets function like graphic tablets, but with a built-in monitor. You can draw directly onto a screen, which feels more intuitive, accurate and nature.
They are usually $200+ more expensive than graphics tablets, size range from 10-inch to 32-inch. But they still need an extra laptop or computer to plug your tablet into – these are essentially a screen monitor.
There are a number of brands for Drawing tablets, but the good 3 name brands you need to know are: Huion, XP-Pen or Wacom. Most tablets that these have to offer are really good, some being more expensive than others.
Wacom was meant for professionals, hence it has an expensive price. Huion and XP-Pen are brands generally bought by beginners and enthusiasts, because they have really good value for money. Other Best Wacom Alternatives include Veikk, Gaomon, and Ugee.
3. Standalone Pen Tablet
You can always use other standalone tablets, like the famous Apple iPad Pro (iPad OS), Microsoft Surface Pro (Windows) or Samsung Galaxy Tab lineup (Android).
All these tablets have pen input support, in-built computer and screen, This makes them very portable – you can take them anywhere, such as sketching on the couch or out in a cafe.
The downside is that they are more expensive, and you have a very limited selection of software available to you.
Choose a digital art software that suits you
This can be drawing software, or it can be 3D modeling software, or even animation software. Whatever works for you.
Each program has its unique strengths and features that can enhance your ability to create your own digital art.
Also, the choice of digital art software depends on your hardware and operating system, because not all software is compatible with all devices.
1. Photo Editing Software
To get started with photo manipulation, you need a photo editing program. While the industry standard is Adobe Photoshop, it's monthly recurring fee can be a bit steep for those just starting out.
Affinity Photo is a powerful and affordable image editor that is directly competing with Photoshop for enthusiasts and professional users.
A great free alternative that still has great function and a good amount of online tutorials is the desktop software GIMP.
Photopea, Canva or Pixlr Editor is perfect if you want to have a browser-based, online way to edit your photos.
2. Digital Illustration Software
As for Digital Illustration software, the most popular digital illustration app is Adobe Illustrator, but as with Photoshop, it's monthly cost isn't all that appealing to beginners.
Coreldraw is another popular Illustration software for print ready graphics and illustrations, the UI is very user friendly and easy for graphics designers.
In terms of function and style, Affinity Designer is an impressive, low-budget alternative to Adobe Illustrator.
Good free alternatives to Illustrator is Inkscape, great to draw beautiful drawings, very fast and light weight.
3. Digital Painting Software

Many artists use Photoshop for digital painting because of Photoshop's wide range of brushes and tools, but there are also some other great alternatives with a cheaper price tag.
If you want to get into digital painting without spending a few hundred dollars every year. This includes Clip Studio Paint, Procreate, Corel Painter, Paint tool SAI, Sketchbook, and free drawing apps like Krita, Medibang Paint, Firealpaca, Mypaint, Artweaver, etc.
4. Animation Software
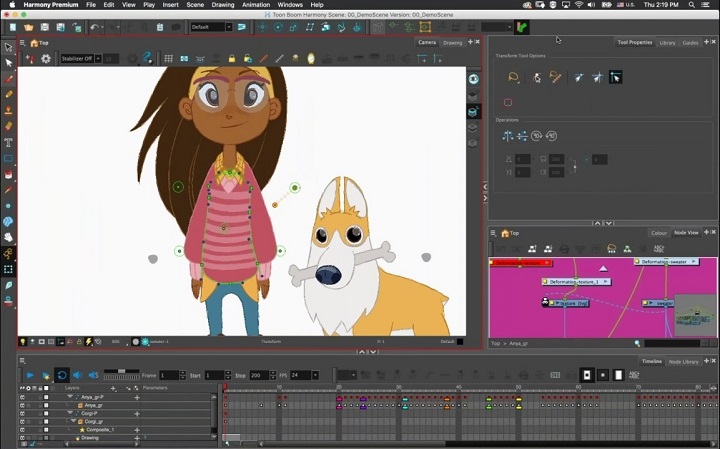
2D Animation Apps: For those who like drawing and creating 2D animation, Toon Boom Harmony, Adobe Animate, Moho Pro, Synfig Studio, Opentoonz, Pencil2D and TVPaint are all well-known and high-quality animations tools.
3D Animation Programs: For 3D animation, Start with any of the software - Blender , 3ds Max, Autodesk Maya, Cinema 4D, Houdini, Modo, Daz Studio, Cascadeur any one of them .
5. 3D Modeling Software
Maxon Cinema 4D, Autodesk Maya and 3DS MAX are three of the most famous 3D modeling software which artists and studios often use in many fields.
Pixologic ZBrush is a digital sculpting tool that combines 3D/2.5D modeling, texturing and painting.
Blender is the most popular 3D creation platform which is free, open-source and powerful. It supports the entirety of the 3D pipeline—modeling, rigging, animation, simulation, rendering, compositing and motion tracking, even video editing and game creation.
How to start Digital Art?
If you guys are a complete beginner with no art experience you should start with drawing by traditional methods first(pen and paper method).
We know that this is not the thing you were expecting but at least do some basic exercises which will give you the flow to draw in the drawing tablet or a iPad or any other gadgets you name it and it requires the skills.
Practice the Art
After getting comfortable with the basics, hardware and software, start your art journey by practicing art.
First choose your Niche or art of your interest and start working towards it. because in the field of art you will improve only when you practice daily or at least practice two to three days a week.
Once you started practicing you will see the results as time goes by and trust us guys it will give you a satisfaction which makes you happy and gives you motivation to draw more and practice more.
Best Digital Art Sites to Share Your Artwork
In the digital world, authenticity and connection are key.
Are you ready to show the world your artwork? These well-known online art sites are the right places to share and explore new digital art Ideas:
DeviantArt: The place to discover millions of works of art in every shape, size, and style. You can also join art tribes and make your voice heard.
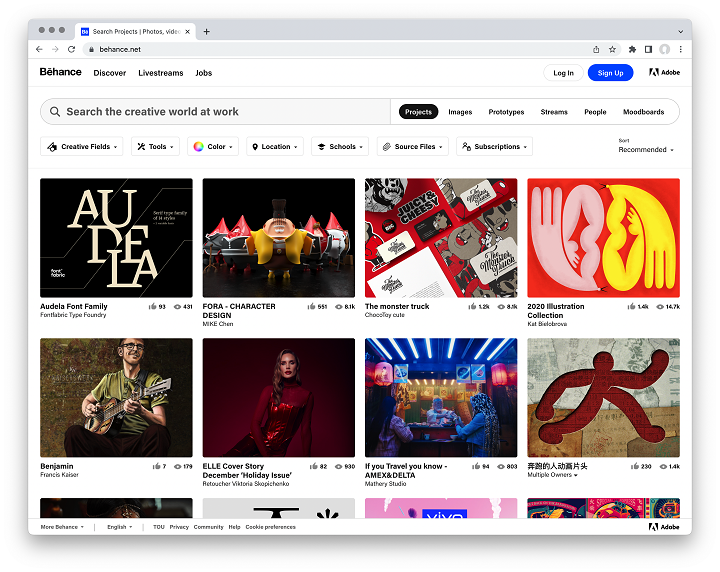
Behance: Here you can exchange ideas with other digital artists, show off your portfolio, and let the community boost your creative ego.
ArtStation: For professionals and aspiring artists alike, especially those in gaming, film, and entertainment. Show them what you've got!
Dribbble: If you are interested in digital design, illustration, or animation, this is your stage to shine. It's also a place where you might land a gig.
Pinterest: Here you'll find an endless treasure trove of ideas and inspiration for all your digital art projects. Create boards, save pins, and unleash your creativity.
Medium: Not just for reading, but also your platform for sharing your stories, especially those related to digital art. Immerse yourself in the world of Blogging Guide, Digital Art, and Pixel Vision.
In addition, Utilize social media to your advantage. Share your art on platforms like Instagram, Facebook, and Twitter. Engage with your audience, and post behind-the-scenes glimpses into your creative process.
Conclusion
We hope our post gave you a better guide on digital art. Enjoy the process and not the destination so that you will feel the satisfaction guys.
Getting started with digital art can feel like an overwhelming task, but don't let the stress get to you.
Adjust your expectations, and watch some tutorials. Your goals won't seem so formidable once you get the hang of things.
If you can do that, you'll be well on your way to mastering a new skill set.
Source: https://pctechtest.com/beginner-guide-to-start-digital-art
Bloggar | Slóð | Facebook | Athugasemdir (0)
Um bloggið
tablets, laptops, and phones review

Heimsóknir
Flettingar
- Í dag (3.8.): 0
- Sl. sólarhring: 4
- Sl. viku: 29
- Frá upphafi: 0
Annað
- Innlit í dag: 0
- Innlit sl. viku: 22
- Gestir í dag: 0
- IP-tölur í dag: 0
Uppfært á 3 mín. fresti.
Skýringar